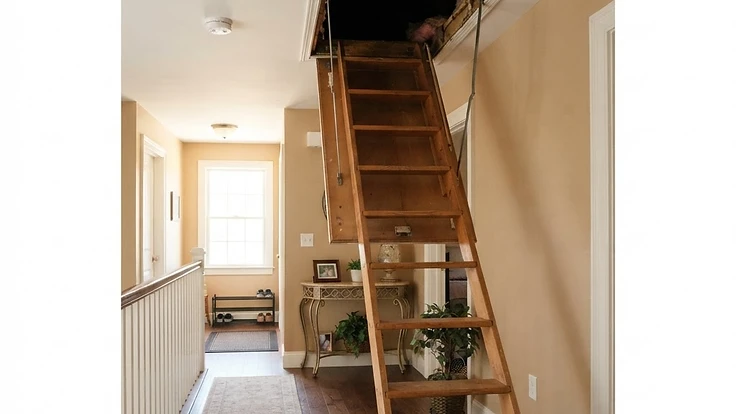
Why Your Attic Pull-Down Stairs Are Quietly Draining Your Energy Bill
Your attic hatch or pull-down stairs may be the biggest hidden air leak in your home—here's how to spot it and seal it.
The Hole in Your Ceiling You Forgot About
Most homeowners obsess over window seals, door sweeps, and attic insulation—but completely forget about the one opening that connects their conditioned living space directly to the unconditioned attic above: the pull-down attic stairs or attic hatch. If you have one of these in a hallway, closet, or garage ceiling, there's a good chance it's one of the single biggest sources of air leakage in your entire house.
Think about it: a standard attic hatch opening is roughly 10 to 30 square feet. Even a tiny gap around the edges of that opening can leak as much air as several open windows combined. And because heat rises, this leak works against you year-round—letting warm air escape upward in winter and letting attic heat pour down into your home in summer.
How to Tell If Your Attic Access Is Leaking
You don't need special equipment to diagnose this one. Try these simple checks:
1. The hand test. On a cold day, run your hand along the perimeter of the pull-down stairs or hatch cover where it meets the ceiling frame. If you feel a draft, you've found your leak.
2. The incense or smoke pencil test. Hold a lit incense stick near the edges of the hatch with the house's exhaust fans running (bathroom fan, range hood). If the smoke gets pulled toward the gap or pushed away sharply, air is moving through there.
3. The flashlight test at night. Turn off the lights in the room below the hatch, then have someone shine a bright flashlight around the attic side of the opening. If light leaks through visible gaps, air is leaking through those same gaps.
4. Check the insulation value. Pull-down stair units are typically just a thin sheet of plywood or OSB with an R-value close to zero. Compare that to the R-38 to R-60 insulation you probably have elsewhere in your attic floor. That stairway is a thermal bypass—a hole in your insulation blanket—even before you consider air leakage.
5. Look for staining or frost. In winter, check the top of the hatch from inside the attic. Frost or moisture buildup on the underside of the wood is a telltale sign that warm, moist household air is condensing there, which also hints at mold risk over time.
Fixing the Air Leak: Weatherstripping and Sealing
The good news is this is one of the most cost-effective fixes in the whole house, often paying for itself in a single heating season.
Step 1: Seal the frame to the ceiling drywall. Over time, the wood frame around the hatch opening can separate slightly from the surrounding drywall, creating a perimeter gap. From inside the attic, run a bead of fire-rated caulk or expanding foam sealant (use the low-expansion type to avoid warping the frame) along this seam.
Step 2: Add weatherstripping to the hatch door itself. This is the same compressible foam or rubber weatherstripping used on exterior doors. Apply it around the perimeter where the hatch panel rests against the frame when closed. This single step often eliminates 80% of the draft.
Step 3: Install a draft-blocking cover. You can buy a pre-made attic stair insulation cover (an insulated zippered tent that sits over the opening from the attic side) for $40–$80, or build your own from a rigid foam board box taped and sealed at the seams. These covers typically add R-10 or more while also blocking air movement when the stairs aren't in use.
Step 4: Latch it down. Many pull-down stairs rely on gravity and friction alone to stay closed, which means they're never fully compressed against the weatherstripping. Installing a simple barrel bolt latch (sold at any hardware store) lets you cinch the hatch tight against the new seal, dramatically improving performance.
What If You Have a Hinged Hatch Instead of Pull-Down Stairs?
The same principles apply. A hinged attic hatch cover should get weatherstripping around its resting edge, insulation added to the back side (rigid foam glued on works well), and a secure latch so it closes snugly rather than just sitting in place. If your hatch is in a garage ceiling, this is especially important, since garages are often unconditioned or poorly sealed themselves, making the attic-to-garage-to-outside pathway a major leak chain.
A Few Things to Avoid
- Don't use fiberglass batt insulation loosely draped over the hatch—it slips, compresses, and doesn't address air leakage, only R-value.
- Don't block the hatch so thoroughly that it becomes difficult to open in an emergency or for routine attic maintenance; you still need safe, usable access.
- Don't skip checking for existing moisture or pest damage around the frame before sealing it up—sealing in a problem is worse than leaving it exposed.
The Payoff
Sealing and insulating an attic hatch is typically a one-to-two-hour project costing under $100 in materials, yet it can measurably reduce drafts, ice dam risk, and HVAC runtime. It's one of those rare home fixes where the effort-to-reward ratio is almost unbeatable—no demolition, no permits, just a weekend afternoon and a caulk gun.
If you've already sealed your windows and doors but still feel a chill (or a surprisingly warm hallway ceiling in summer), your attic access point is worth a second look. It's an easy blind spot, and now you know exactly how to find it and fix it.
Start your free HomeNostics trial to get reminders for seasonal maintenance checks like this one, plus a running log of every fix you make around the house.