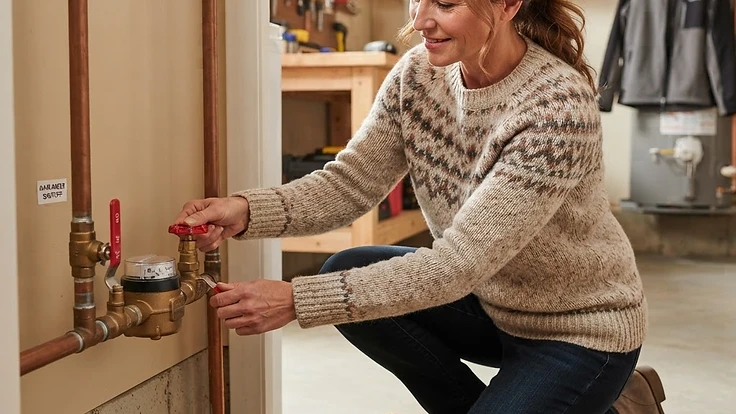
Why You Should Test Your Main Water Shutoff Valve Before You Need It
A frozen or seized main water shutoff valve can turn a small leak into a flood—here's how to find, test, and fix yours now.
The Valve You've Never Touched Could Be Your Biggest Liability
Somewhere in your house—usually in the basement, a crawlspace, or near the water meter—there's a valve that controls every drop of water flowing into your home. Most homeowners never touch it. They don't know exactly where it is, they've never turned it, and they assume it'll work perfectly the one time they desperately need it.
That's a dangerous assumption. Shutoff valves that sit untouched for years often corrode, seize up, or develop mineral buildup that keeps them from closing fully. When a supply line bursts or a water heater fails at 2 a.m., the last thing you want to discover is that your emergency shutoff won't shut off.
Here's how to find your main valve, test it safely, and make sure it'll actually work when it matters.
Why This Matters More Than You Think
A burst pipe can dump 10 to 15 gallons of water per minute into your home. Within minutes, you're looking at soaked drywall, warped flooring, and potentially thousands of dollars in damage. The single fastest way to limit that damage is shutting off the water supply immediately—faster than any plumber can arrive.
But a valve that's rusted shut, or one that's painted over and forgotten, buys you nothing. You need to know two things before an emergency: where the valve is, and whether it actually closes.
Step 1: Locate Your Main Shutoff Valve
Most homes have the main shutoff in one of these spots:
- Near the water meter, inside or just outside the house
- In the basement, close to where the main line enters
- In a utility closet, crawlspace, or garage on homes without basements
- Near the water heater, especially in newer construction
If you live in a warmer climate, the valve might be outside near the foundation, sometimes in a small box at ground level.
If you genuinely can't find it, check your home inspection report from when you bought the house—it's often noted there. Still stuck? A quick call to your water utility or a local plumber can usually point you in the right direction in minutes.
Once you find it, label it clearly. A simple tag or even a piece of tape with "MAIN WATER SHUTOFF" written on it saves precious time during a panic situation—especially if someone else in your household needs to use it.
Step 2: Test It While Everything Is Calm
Don't wait for an emergency to find out your valve is seized. Test it now, on a day when nothing's wrong, so you have time to fix problems calmly.
For a ball valve (usually has a lever handle):
- Turn the lever a quarter turn to fully perpendicular to the pipe.
- Check a faucet inside to confirm water flow has stopped.
- Turn it back to fully open.
For a gate valve (round handle, like a wheel):
- Turn clockwise until it stops—don't force it if it feels frozen.
- Check that water flow has stopped at an indoor faucet.
- Turn counterclockwise to reopen.
If the valve turns smoothly and water stops completely, you're in good shape. If it's stiff, leaks around the stem when you turn it, or doesn't fully stop the flow, you have a problem worth addressing now rather than during a crisis.
What If the Valve Is Stuck or Leaking?
Gate valves are notorious for seizing after years of disuse, since the internal gate can corrode or collect mineral deposits. If yours is stiff:
- Try a few drops of penetrating oil on the stem, let it sit 10–15 minutes, then attempt again with gentle, steady pressure—never force it with excessive torque, which can snap the stem.
- If it won't budge or starts leaking at the packing nut, it's time to replace the valve. This is a job most confident DIYers can handle, but it requires shutting off water at the street or meter level first, which may need your utility company's involvement.
- If you're not comfortable cutting into the main line, call a plumber. Replacing a failing main shutoff valve typically costs $150–$350 depending on your area and valve type, and it's money well spent compared to flood damage.
Step 3: Know Your Secondary Shutoffs Too
While you're at it, locate and test the shutoff valves for individual fixtures—under sinks, behind toilets, and at the washing machine. These let you isolate a problem without killing water to the entire house. They fail just as often as main valves, especially the small oval handles under bathroom sinks, which can corrode shut within a few years in hard-water areas.
Test these twice a year. If any feel stiff or won't fully stop water flow, replace them—they're inexpensive (usually $10–$20) and simple to swap when the water's already off.
Make It a Seasonal Habit
Tie this task to something you already do twice a year, like changing smoke detector batteries or switching HVAC filters. A two-minute valve test costs you nothing, but it can be the difference between a quick fix and a four-figure insurance claim.
The Bottom Line
Your home's main water shutoff valve is one of the most important safety features in your house, yet it's almost always overlooked until it's needed in a crisis—and by then, it's too late to fix a seized valve. Find it, label it, test it, and replace it if it's not working properly. It's a small investment of time that protects your home from one of the most common and expensive types of damage homeowners face.
Want help tracking maintenance tasks like this automatically, so nothing falls through the cracks? Start your free HomeNostics trial.