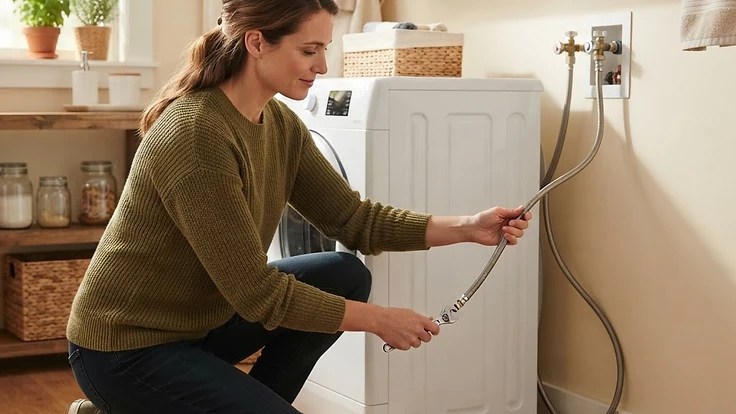
Your Washing Machine Hose Is a Ticking Time Bomb (Here's How to Defuse It)
Washing machine hoses cause thousands of home floods every year—here's how to spot a failing one and stop a disaster before it starts.
The Hose No One Thinks About Until It's Too Late
Here's a sobering fact: washing machine hose failures are one of the top causes of residential water damage claims, and the average claim runs into the thousands of dollars. The culprit is almost always the same — a cheap, aging rubber hose that finally gives out while no one's home, quietly pumping gallons of water into your laundry room, hallway, and whatever's below it.
The good news? This is one of the easiest home disasters to prevent. It takes about ten minutes and costs less than dinner out.
Why These Hoses Fail
Most washing machines come with basic black rubber hoses. They're fine when new, but rubber degrades over time due to a combination of factors:
- Constant water pressure. Unlike a garden hose that's only pressurized when in use, your washer's fill hoses are under full household water pressure 24/7 — even when the machine isn't running.
- Heat and chemical exposure. Hot water cycles and detergent residue slowly break down rubber from the inside out.
- Kinking and rubbing. If the hose is bent sharply behind the machine or rubs against the wall, that stress point weakens faster than the rest of the hose.
- Simple age. Manufacturers generally recommend replacing rubber hoses every 3–5 years, but most homeowners never think about it until something goes wrong.
When a hose finally splits or blows off its fitting, it's not a slow drip — it's a full-pressure gush that can release 500+ gallons of water in an hour if it happens while you're out running errands.
How to Inspect Your Hoses Right Now
Pull your washer away from the wall far enough to see both the hot and cold supply hoses clearly (unplug the machine first for safety). Check for:
- Bulging or ballooning anywhere along the hose — this is a sign the inner lining is failing and it could burst soon.
- Cracks or brittleness, especially near the fittings on either end where stress concentrates.
- Rust or white mineral buildup around the connection points, which often signals a slow leak that's been evaporating unnoticed.
- Kinks or tight bends from the washer being pushed too close to the wall.
- The hose material itself. If it's plain black rubber and you don't know its age, assume it's overdue for replacement.
If you see any of the first three signs, stop reading and go turn off the water valves behind your washer now — don't wait for laundry day.
The Fix: Upgrade to Braided Stainless Steel
The single best upgrade you can make is replacing rubber hoses with stainless steel braided hoses. They cost roughly $15–$25 for a pair and are available at any hardware store. The braided metal exterior resists bursting even as the inner rubber core ages, and they typically last far longer than standard rubber hoses — some manufacturers rate them for 10+ years.
To replace them:
- Turn off both water supply valves (usually a hot and cold knob on the wall behind the washer).
- Unplug the washer and pull it away from the wall for access.
- Place a towel or shallow pan under the connections — some residual water will spill out.
- Unscrew the old hoses from both the wall valves and the back of the machine using pliers if they're tight.
- Screw on the new braided hoses hand-tight, then give them a quarter turn with pliers — don't overtighten, as this can damage the rubber washer inside the fitting.
- Turn the water back on slowly and check both connections for drips before pushing the washer back into place.
While you're in there, make sure the hoses have a slight curve rather than a sharp bend, and leave a few inches of clearance between the washer and the wall.
Extra Layers of Protection
Even with new hoses, a few additional habits dramatically reduce your flood risk:
- Turn off the water supply valves when you leave for vacation or won't be using the washer for an extended period. This removes constant pressure from the hoses entirely.
- Install a washing machine leak tray (a shallow plastic pan that sits under the unit) to catch and redirect minor leaks before they reach your flooring.
- Consider an automatic shutoff valve, a device that senses water flow abnormalities and cuts the supply automatically — useful if your laundry room is on an upper floor or far from living spaces where a leak might go unnoticed.
- Set a replacement reminder. Treat hose replacement like changing smoke detector batteries — put it on a recurring calendar reminder every 3–5 years so it doesn't quietly become a ticking time bomb again.
A Small Job That Prevents a Big Problem
Most home disasters don't come from dramatic, unpredictable events — they come from small, overlooked parts quietly wearing out. Your washing machine hose is a perfect example: a $20 part that, if ignored, can lead to warped floors, ruined drywall, and mold remediation costs that stretch into the thousands.
Take ten minutes this week to check your hoses. If they're original equipment or you can't remember the last time you replaced them, treat that as your answer.
This article is general information and not legal, financial, or medical advice.
Start your free HomeNostics trial to get maintenance reminders — like hose replacements and appliance checkups — before small problems turn into expensive ones.