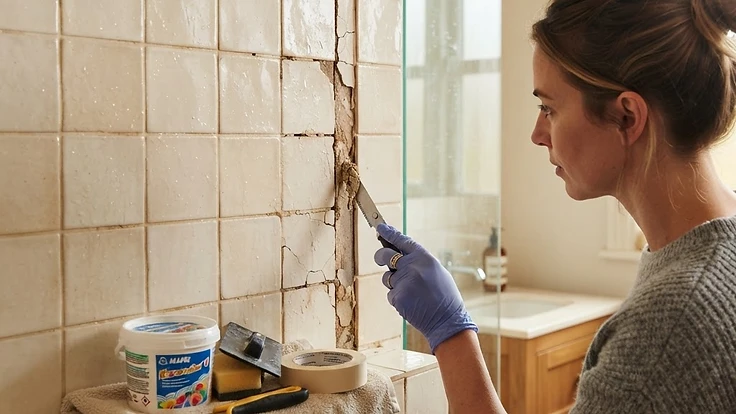
Why Your Bathroom Tile Grout Is Cracking and Crumbling (And How to Fix It Before Water Gets Behind the Wall)
Cracked grout isn't just ugly—it's a water entry point that can rot subfloors and walls if ignored.
The Small Crack That Causes Big Problems
Grout is the unsung hero of your bathroom. It fills the gaps between tiles and keeps water from sneaking behind your walls and under your floor. But grout isn't flexible like caulk—it's a rigid, cement-based material, which means over time it's prone to cracking, crumbling, and pulling away from the tile edges. A lot of homeowners shrug this off as a cosmetic issue. It's not. Once grout fails, water has a direct path to the plywood, drywall, or subfloor underneath, and that's where small problems turn into expensive ones involving mold and rot.
Here's how to figure out why your grout is failing and how to fix it before it costs you a lot more than a weekend project.
Why Grout Cracks and Crumbles in the First Place
1. Too Much Water, Too Often
Grout is porous. Even sealed grout absorbs some moisture over time, especially in showers that get heavy daily use. Constant saturation weakens the cement bond, causing it to crack and eventually crumble out in chunks.
2. The Tile Isn't Moving With the House—But It Is Moving
Homes shift slightly with temperature changes, humidity, and settling. Grout has almost no flexibility, so when tile or the substrate beneath it moves even a little, grout cracks along stress points—especially in corners, along tub edges, and where floor meets wall.
3. It Was Mixed or Applied Incorrectly
Grout that's mixed too thin, applied too thick, or not allowed to cure properly before getting wet is weaker from day one. This is extremely common with bargain bathroom remodels or quick DIY jobs where curing time got skipped to save a weekend.
4. Missing or Degraded Sealant at Transition Points
Corners, the joint between the tub and tile, and where tile meets a different material should use flexible caulk, not grout. If someone grouted these spots instead of caulking them, cracking is almost guaranteed because grout can't handle that movement.
5. It's Simply Old
Grout has a lifespan. Even well-maintained grout typically needs resealing every 1–2 years and often needs replacement after 10–15 years, depending on usage and ventilation.
How to Tell If Water Has Already Gotten Behind the Tile
Before you repair the grout, check whether moisture has already caused hidden damage. Look for:
- Soft or spongy spots on the floor near the shower or tub
- Discoloration on the ceiling or wall of the room below (if there is one)
- A musty smell that lingers even after cleaning
- Tiles that feel loose or shift slightly when pressed
- Visible gaps where grout has fully separated from the tile edge
If you notice any of these signs, don't just regrout and move on—you may have a bigger issue like a rotted subfloor or mold growth behind the wall that needs professional assessment first.
How to Fix Cracking or Crumbling Grout Yourself
If there's no hidden damage, this is a very doable weekend project.
Step 1: Remove the Damaged Grout
Use a grout saw, a carbide-tipped scraper, or an oscillating tool with a grout removal blade. Work slowly to avoid chipping the tile edges. Remove grout to a depth of at least 2/3 of its thickness—don't just scratch the surface.
Step 2: Clean the Joints Thoroughly
Vacuum out dust and debris, then wipe the joints with a damp cloth. Any leftover dust will weaken the bond of the new grout.
Step 3: Check for Moisture Before You Regrout
Let the area dry completely for at least 24 hours. If you're not sure it's dry, a simple moisture meter (inexpensive and available at any hardware store) can confirm it before you seal everything back up.
Step 4: Mix and Apply New Grout
Choose the right type:
- Sanded grout for joints wider than 1/8 inch (more durable, better for floors)
- Unsanded grout for narrow joints or softer tile that could scratch
Mix to a peanut-butter consistency, apply with a rubber float at a 45-degree angle, and pack it fully into the joints. Wipe excess at a diagonal to avoid pulling grout back out.
Step 5: Cure, Then Seal
Let the grout cure for the time listed on the package—usually 48–72 hours—before it gets wet. Once cured, apply a penetrating grout sealer. This single step dramatically slows future cracking by reducing how much water the grout absorbs.
Step 6: Re-Caulk the Movement Joints
Any corner, tub edge, or wall-to-floor transition should get flexible silicone caulk, not grout. This is the fix that prevents the exact same cracking from happening again in those spots.
Keeping Grout From Failing Again
- Run your bathroom fan during and for 20 minutes after every shower to cut down on trapped moisture
- Reseal grout annually in high-use bathrooms
- Wipe down tile walls after showering a few times a week to reduce mineral and soap buildup that stresses grout lines
- Address cracks within days, not months—small cracks are a 20-minute fix; neglected cracks often mean tearing out tile
The Bottom Line
Cracked or crumbling grout is one of those problems that's genuinely cheap and fast to fix early, and genuinely expensive once water gets behind the tile. A few hours with a grout saw and a float now can save you from a subfloor replacement later. If you catch it early and reseal regularly, your tile work can easily outlast the rest of the bathroom.
Want a reminder before small maintenance jobs like this turn into big ones? Start your free HomeNostics trial and let it track your home's maintenance schedule for you.