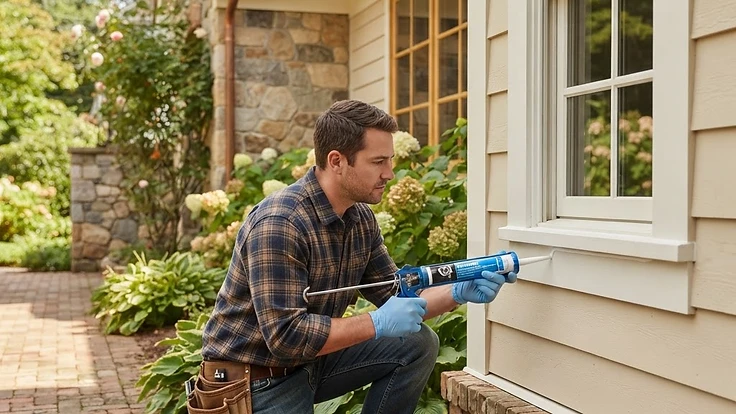
Why Your Exterior Caulk Keeps Failing (And How to Make It Last for Years)
Learn why exterior caulk cracks and peels within a year, and the simple prep steps that make a caulk job actually last.
The Caulk That Never Seems to Last
If you find yourself re-caulking the same window trim, door frame, or siding joint every year, you're not alone — and you're not doing anything wrong by trying. The problem is almost never the caulk brand. It's almost always the prep work (or lack of it) underneath. Caulk that's applied over dirt, old residue, or damp wood is set up to fail from day one, no matter how expensive the tube.
The good news: once you understand why caulk actually fails, fixing it properly takes about the same amount of time as doing it wrong — you just do a few extra steps in the right order.
Why Caulk Cracks, Peels, and Pulls Away
1. It was applied over old caulk or grime. Caulk needs to bond directly to a clean surface. If you squeeze a new bead over the remnants of the old one, you're gluing new caulk to old caulk — not to your house. That bond fails fast.
2. The surface was damp. Most caulks, including many labeled "all-weather," need a dry surface to cure properly. Morning dew or a recent rain can trap moisture under the bead, which leads to bubbling and peeling within months.
3. Wrong caulk for the job. Not all caulk is created equal:
- Acrylic latex caulk is easy to apply and paintable but flexes poorly and tends to crack in areas with a lot of movement, like where two different materials meet.
- Silicone caulk is highly flexible and water-resistant but can't be painted and doesn't adhere well to porous surfaces like unprimed wood.
- Polyurethane or hybrid sealants offer the best of both — strong adhesion, flexibility, and paintability — but cost more and cure slower.
Using a cheap acrylic caulk on a gap that expands and contracts with temperature (like around a window frame) is a recipe for cracking within a season.
4. The gap was too wide or too narrow. Caulk is a sealant, not a filler. Gaps wider than about 3/8 inch need a foam backer rod inserted first so the caulk has something to bond to on both sides instead of trying to span open air.
How to Caulk It Right the First Time
Step 1: Remove the old caulk completely
Use a caulk-removal tool, a 5-in-1 painter's tool, or a utility knife to scrape out every bit of the old bead. Don't leave flaky remnants — they'll undermine the new seal. For stubborn silicone residue, a bit of rubbing alcohol on a rag helps lift it.
Step 2: Clean and dry the surface
Wipe the joint down with a rag dampened with rubbing alcohol or a mild detergent solution to remove dirt, mildew, and oils. Let it dry completely — ideally caulk on a day with low humidity and no rain in the forecast for at least 24 hours. Avoid caulking in direct early-morning sun too, since residual dew can linger in shaded gaps longer than you'd expect.
Step 3: Choose the right caulk for the material and movement
- For gaps between two different materials (like where siding meets a window frame), use a flexible polyurethane or siliconized acrylic hybrid.
- For gaps in masonry or concrete, use a specialty masonry or polyurethane sealant.
- For pure trim-to-trim wood joints that you plan to paint, a quality paintable acrylic-latex/silicone hybrid works well.
Check the label for "exterior" and look for a flexibility rating — products advertised for "movement" or "expansion joints" tend to hold up better around windows and doors.
Step 4: Use a backer rod for wide gaps
If the gap is wider than 3/8 inch, push a foam backer rod into the joint before caulking. This gives the caulk a surface to bond to on each side rather than bridging an open void, which dramatically reduces cracking.
Step 5: Apply with a steady bead and tool it immediately
Cut your caulk tube nozzle at a 45-degree angle sized to the gap width. Apply a steady, even bead by pulling (not pushing) the gun along the joint. Within a minute or two, smooth the bead with a wet finger or a caulking tool so it forms a slight concave shape pressed into both sides of the joint — this improves adhesion and sheds water better than a bulging bead.
Step 6: Let it cure fully before exposing it to rain
Check the product's cure time — it's often 24 hours for a light rain and up to a week for full cure. Caulking right before a storm is one of the most common reasons a "properly applied" bead still fails.
Where to Focus Your Attention
Not every gap needs equal urgency. Prioritize these high-risk spots:
- Around window and door frames (constant movement + water exposure)
- Where trim meets siding
- Roofline flashing and where chimneys meet the roof
- Any gap below grade or near the foundation, where water pooling is a bigger risk
A quick walk around your home's exterior twice a year — spring and fall — lets you catch small cracks before they let water behind your siding or trim, where it can cause rot you won't see until it's expensive.
Small Job, Big Payoff
Re-caulking isn't glamorous, but it's one of the cheapest ways to prevent water intrusion, drafts, and wood rot. Do the prep work once, choose the right product for the joint, and you can go from an annual chore to a job you only think about every five years.
Want a reminder before caulk-failure season hits and a simple way to track which areas of your home need seasonal attention? Start your free HomeNostics trial and let it help you stay ahead of the small jobs before they become big ones.