Why Your Outdoor Faucets Freeze and Burst in Winter (And How to Protect Them Before It's Too Late)
Learn why outdoor faucets burst in winter and how a 15-minute fall checklist can save you thousands in water damage.
The $5,000 Mistake Hiding Behind Your Hose Bib
Every spring, plumbers get flooded with calls from homeowners who turn on their outdoor faucet for the first time and discover water spraying inside their basement or crawl space. The faucet itself looks fine from outside. The real damage happened months earlier, when water trapped inside the pipe froze, expanded, and cracked the line somewhere behind the wall—completely out of sight. By the time anyone notices, it's often a four-figure repair.
The good news: this is one of the most preventable problems in home maintenance. It takes about 15 minutes in the fall and almost no money.
Why Outdoor Faucets Are So Vulnerable
Standard outdoor faucets (sometimes called hose bibs or spigots) are more exposed to cold than almost any other plumbing fixture in your house. A few things make them especially risky:
- They sit on an exterior wall, often with minimal insulation behind them.
- Water left inside the pipe has nowhere to go. When it freezes, it expands by about 9%, and that pressure has to go somewhere—usually a crack in the pipe a foot or two inside the wall.
- A connected garden hose traps water in the faucet itself, even if you shut the valve off, which defeats the purpose of "frost-proof" designs.
- Older homes often have traditional (non-frost-proof) spigots, where the shutoff valve is right at the exterior wall instead of several inches inside the heated part of the house.
The tricky part is that a cracked pipe from a frozen faucet usually doesn't leak immediately. It leaks when the ice melts and the water finally has a path to escape—which is why so many people discover the problem in spring, long after the actual damage occurred.
How to Tell If You Have a Frost-Proof or Standard Faucet
Before you can winterize correctly, you need to know what type you have:
- Frost-proof (sillcock) faucets have a long stem—often 6 to 12 inches—that runs from the exterior handle back into the heated interior of the house. The actual shutoff valve is on the warm end of that stem, not at the wall.
- Standard faucets are shorter, with the shutoff valve sitting right at the exterior wall, fully exposed to outdoor temperatures.
If you're not sure which one you have, look underneath the fixture from inside your basement or crawl space. If you can see a long pipe extending from the wall, you likely have a frost-proof model.
Either type can still freeze and crack if it's not properly prepared for winter—frost-proof doesn't mean freeze-proof if you skip a step.
The Fall Checklist: Protecting Your Faucets Before the First Freeze
Do this before overnight temperatures start dropping below freezing, ideally in early-to-mid fall depending on your climate.
1. Disconnect every garden hose. This is the single most common cause of frozen spigots, even the expensive frost-proof kind. A hose left attached traps water in the faucet body, where it can freeze and crack the fixture regardless of how well-designed it is.
2. Drain the faucet completely. After disconnecting the hose, open the faucet fully and let it run until no more water comes out. Tilt a bucket under it if needed to catch residual water.
3. Shut off the interior supply valve, if you have one. Many homes have a dedicated shutoff valve for outdoor faucets, usually located in the basement or crawl space near where the pipe enters the exterior wall. Turn it off, then open the outdoor faucet again briefly to release any remaining pressure and water in the line. Leave the outdoor faucet open slightly through winter—this gives any trapped water room to expand without bursting the pipe.
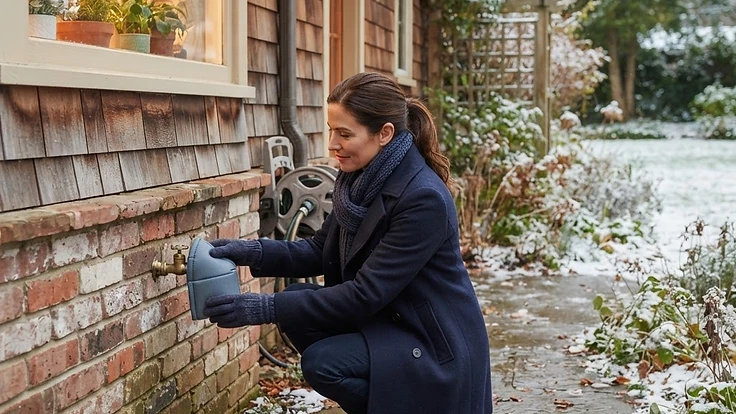
4. Install an insulated faucet cover. These foam or hard-shell covers cost a few dollars and slip over the entire faucet. They won't fix an already-vulnerable setup, but they add a meaningful buffer against wind chill and sudden cold snaps, especially for standard (non-frost-proof) faucets.
5. Check for drafts around the pipe penetration. From inside your basement or crawl space, look at the hole where the faucet pipe passes through the exterior wall. If you can feel air movement or see daylight around the edges, seal it with expanding foam or caulk. This single step does double duty—it stops cold air from reaching the pipe and also blocks a common entry point for mice.
If You Suspect a Pipe Already Cracked
If a faucet was frozen over winter, don't just turn it on full blast in spring and walk away. Instead:
- Turn the water on slowly and watch the faucet and the wall around it for several minutes.
- Check inside the basement or crawl space directly behind the fixture for any dampness, drips, or water stains on the framing.
- If the faucet sprays weakly or water seems to be escaping somewhere you can't see, shut the supply off immediately and inspect the interior pipe run before using it again.
Catching a cracked line before it's under full water pressure for weeks can be the difference between a small patch job and replacing drywall, insulation, and flooring.
A Small Habit That Prevents a Big Repair
Frozen and burst outdoor faucets are almost entirely avoidable with a few minutes of fall prep. The real lesson here isn't complicated: disconnect hoses, drain the lines, shut off the interior valve if you have one, and don't assume "frost-proof" means you can skip the basics. A pipe that cracks in January often doesn't show itself until a warm day in March—so a little attention now saves you from a much bigger mess later.
If you'd rather not keep track of seasonal maintenance tasks like this in your head, Start your free HomeNostics trial and let the app remind you exactly when it's time to winterize your faucets, check your pipes, and handle the dozens of other small jobs that protect your home year-round.