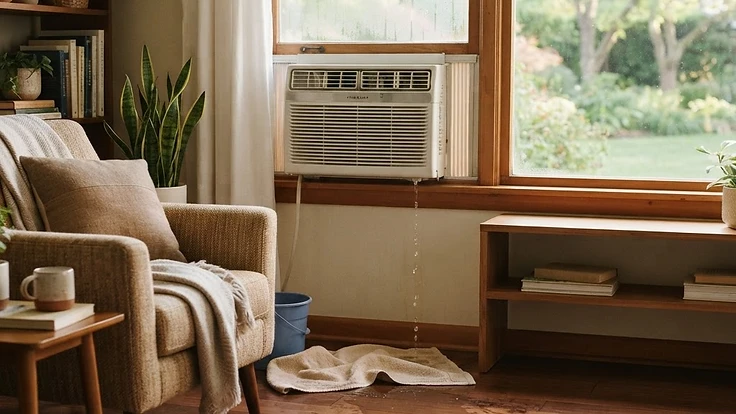
Why Your Window Air Conditioner Is Leaking Water Inside Your Home (And How to Fix It)
Water dripping from your window AC unit indoors usually means a tilt, clog, or seal problem — here's how to diagnose and fix it fast.
The Puddle That Shouldn't Be There
It's a hot afternoon, your window air conditioner is humming along, and then you notice it: a growing puddle on the windowsill, dripping down the wall, or pooling on your floor. A little condensation on the outside of a window AC unit is normal — that's how it's supposed to work. But water leaking inside your home is a sign something's off, and if you ignore it, you're looking at warped sills, stained walls, or even mold growth behind your drywall.
The good news: most indoor AC leaks come down to one of four fixable problems. Here's how to figure out which one you've got.
Check the Tilt First
Window units are designed to drain condensation outward, not into your house. That only works if the unit is tilted slightly backward — toward the outside — usually by about a quarter to half an inch.
How to check it:
- Place a level on top of the unit, running front to back.
- The back edge (outside) should sit slightly lower than the front edge (inside).
- If the unit is level or tilted the wrong way, condensation pools inside the casing and eventually spills over the front edge into your room.
The fix: Most units have adjustable mounting brackets or shims built into the installation kit. If yours was installed without shims, a few thin wood wedges or a folded piece of weatherstripping under the back of the unit will correct the angle. Re-check with the level after adjusting, and run the unit for an hour to confirm the leak stops.
Look for a Clogged Drain Pan or Weep Hole
Inside the unit, condensation collects in a drain pan at the base, which is supposed to funnel water out through a small opening called a weep hole on the back of the housing. Dust, pollen, and debris build up here over a season or two, especially if you run the unit with the windows open or near trees.
Signs this is your issue:
- The unit is tilted correctly, but it still leaks.
- You hear a faint sloshing sound when you tap the housing.
- The leak is worse on humid days, when more condensation is produced.
The fix: Unplug the unit and remove the front cover (check your manual — most pop off with a few screws or clips). Locate the drain pan at the bottom and the weep hole on the back exterior panel. Use a pipe cleaner, a bent wire hanger, or a turkey baster with warm water to flush out debris. Wipe the pan dry and clear before reassembling. Doing this once a season prevents the problem from coming back.
Inspect the Air Filter and Coils
A dirty air filter restricts airflow across the evaporator coils, which can cause them to get too cold and ice over. When that ice melts faster than the drain system can handle, it overwhelms the pan and leaks inside.
How to check it:
- Pull out the filter (usually slides out from the front grille) and hold it up to a light. If you can't see light through it clearly, it's time to clean or replace it.
- Look at the coils behind the filter for a layer of frost or ice, especially after the unit has been running for a while.
The fix: Clean a reusable filter with warm water and mild soap, let it dry fully, and pop it back in. Replace disposable filters outright. If you find ice on the coils, turn the unit off and let it fully defrost (several hours) before restarting. Going forward, check and clean the filter every two to four weeks during heavy use — it's the single easiest way to prevent this whole chain of problems.
Check the Window Seal and Side Panels
Sometimes the leak isn't condensation at all — it's rain or humid outside air getting pulled in through gaps around the unit. This is common with accordion-style side panels that don't seal tightly against the window frame.
How to check it:
- On a rainy day, look closely at the top and sides of the unit for moisture tracking in from outside rather than dripping from the front.
- Shine a flashlight around the side panels at night and check from outside for light leaking through gaps.
The fix: Foam weatherstripping tape along the side panels and top sash gap seals these leaks cheaply and takes about ten minutes. For a more permanent fix, a window AC support bracket keeps the unit properly seated and reduces gaps caused by the unit's weight pulling it forward over time.
When to Call for Help
If you've checked the tilt, cleared the drain, cleaned the filter, and sealed the panels but the leak persists, the issue might be a cracked drain pan, a failing condensate pump (on larger units), or refrigerant problems causing excessive icing. At that point, it's worth having an HVAC technician take a look rather than risk water damage to your walls or flooring.
Small Fix, Big Payoff
An indoor AC leak looks alarming, but it's almost always one of these four straightforward issues — and most are fixable in under thirty minutes with tools you already have. Catching it early saves your windowsill, your walls, and your weekend.
This article is general information and not legal, financial, or medical advice.
Start your free HomeNostics trial to get seasonal maintenance reminders for your AC units — and every other system in your home — before small issues turn into expensive ones.