Why Your Doorbell Stopped Working (And How to Diagnose the Real Cause)
A dead doorbell usually isn't the whole system—here's how to trace the fault to the button, transformer, wiring, or chime in minutes.
The Doorbell Is Simpler Than You Think—Until It Isn't
A doorbell feels like it should be foolproof: push a button, hear a chime. But when it stops working, most homeowners assume the whole system is dead and either ignore it or call an electrician for a job that often takes ten minutes to diagnose yourself. The truth is a traditional wired doorbell has only four components that can fail—the button, the transformer, the wiring, and the chime unit—and testing them in order will almost always point you to the culprit.
Step 1: Rule Out the Chime Unit First
Start at the easiest point to check: the chime box itself, usually mounted inside a hallway, kitchen, or utility closet.
- Remove the cover and look for a small reset button or loose wire connections.
- Check if the chime hums faintly when the doorbell button is pressed. A faint buzz with no bell sound often means a worn-out solenoid or a stuck striker inside the chime mechanism.
- If you have a digital chime, make sure it's plugged in (some newer units run on standard outlets) and that the volume switch hasn't been accidentally flipped to off.
If the chime shows zero signs of life no matter what you do at the button, move on to the transformer.
Step 2: Test the Button
The doorbell button takes a beating—rain, sun, and years of pressing eventually wear out the internal contacts.
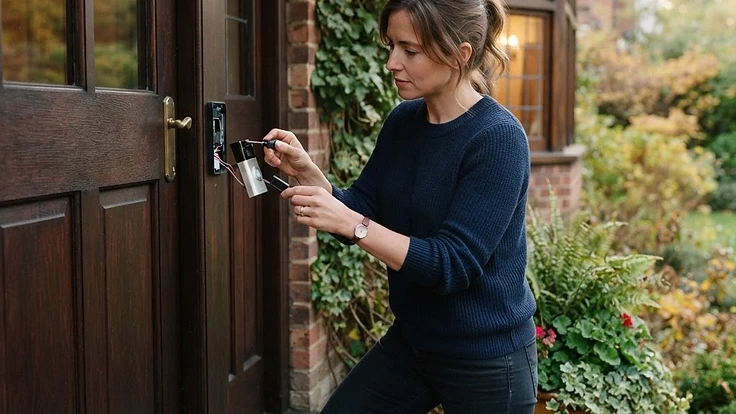
- Unscrew the button from the wall and pull it away gently (the wires stay attached).
- Look at the two wires connected to the back. Carefully touch them together (with the power still on) for a second. If the chime rings, the button itself is faulty and needs replacing—a $10–15 fix.
- If nothing happens, the problem is further back in the system.
This simple test eliminates the most commonly blamed (and most commonly innocent) part of the system.
Step 3: Check the Transformer Voltage
Most doorbells run on 10–24 volts supplied by a small transformer, often tucked near your electrical panel, in a basement, or behind the chime unit itself. Transformers are cheap but failure-prone, especially in older homes.
- Locate the transformer and set a multimeter to AC voltage.
- Touch the probes to the two low-voltage terminals (not the 120V side—leave that wiring alone unless you're comfortable working near a panel).
- You should see a reading close to the transformer's rated output, usually printed on the unit (commonly 16V or 24V).
- If the reading is zero or wildly low, the transformer has likely failed and needs replacing. This is a straightforward swap, but because it taps into your home's main electrical panel, this is the point where many homeowners choose to call an electrician rather than DIY it.
If voltage looks normal, the transformer is innocent too—move to the wiring.
Step 4: Inspect the Wiring for Breaks or Corrosion
Doorbell wiring runs through exterior walls, attics, and crawl spaces, which makes it vulnerable to moisture, rodents, and age-related brittleness.
- Look at the wire where it enters the house near the button. Cracked, green, or crusty connections are a sign of corrosion.
- If accessible, follow the wire run for any obvious pinches, chew marks, or breaks—especially in older homes where wiring may have been stapled too tightly decades ago.
- A continuity test with a multimeter (set to resistance/ohms) across the full wire run, disconnected at both ends, will confirm whether the wire itself is broken.
Broken or corroded wiring is a common culprit in homes over 30 years old, and it's often cheaper to run a new low-voltage wire along the same path than to repair the old one.
What If You Have a Smart Doorbell?
If you've upgraded to a Ring, Nest, or similar video doorbell, the troubleshooting shifts slightly:
- Power issues: Many smart doorbells still rely on your existing transformer and wiring. If your transformer's output is too low (smart doorbells often need 16–24V, while older systems ran on 10V), the device may work intermittently or not charge properly.
- Wi-Fi dropouts: A doorbell that worked for weeks and then went silent is often a connectivity issue, not an electrical one. Check your router's signal strength at the front door and consider a Wi-Fi extender if needed.
- App notifications: Sometimes the doorbell is ringing fine, but notification settings or Do Not Disturb modes on your phone are muting the alert.
Don't assume a smart doorbell failure is wiring-related until you've ruled out power supply and network issues first.
When to Call an Electrician
Most doorbell repairs are safe, low-voltage DIY jobs. But call a licensed electrician if:
- The transformer needs replacing and it's hardwired into your main panel.
- You find scorch marks, melted insulation, or a burning smell near the transformer or wiring.
- The issue keeps recurring even after replacing parts, which can indicate a deeper wiring problem in the wall.
A Quiet Doorbell Doesn't Mean a Big Repair
A non-working doorbell is rarely an all-or-nothing failure—it's almost always one specific component giving out. By testing the chime, button, transformer, and wiring in order, you can usually pinpoint the problem in under 30 minutes and decide whether it's a $10 fix or a job worth handing off to a pro.
Keeping track of small home systems like this—what's been replaced, when, and what to check first—is exactly the kind of thing that saves time and money over the years. Start your free HomeNostics trial to keep a running log of your home's systems and get reminders before small issues turn into bigger ones.