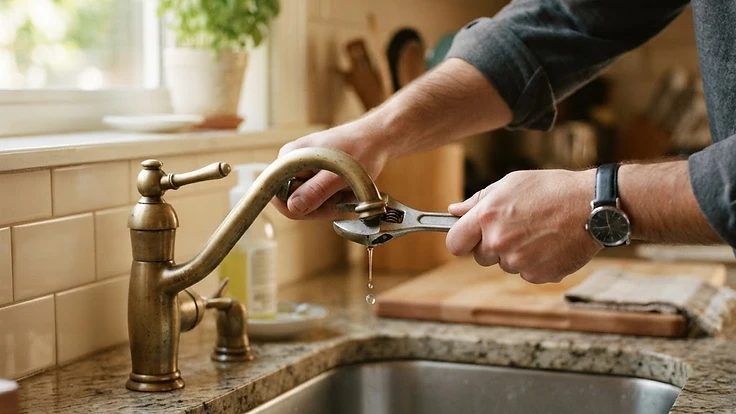
Why Your Faucet Keeps Dripping After You Turn It Off (And How to Fix It Yourself)
A dripping faucet usually means a worn-out internal part, not a mystery—here's how to diagnose and fix it in under an hour.
Why Your Faucet Keeps Dripping After You Turn It Off (And How to Fix It Yourself)
That rhythmic drip... drip... drip from your kitchen or bathroom faucet isn't just an irritating background noise—it's a sign that something inside the faucet has worn out. The good news? Faucet drips are almost always caused by a handful of predictable, inexpensive parts, and fixing them yourself usually takes less than an hour and costs under $20.
Why Faucets Drip in the First Place
Every faucet relies on an internal mechanism to stop water flow when you shut it off. Depending on your faucet type, that mechanism is one of the following:
- Compression faucets (two separate hot/cold handles, common in older homes) use rubber washers that get compressed against a valve seat.
- Cartridge faucets (single lever, common in modern kitchens and bathrooms) use a replaceable cartridge with O-rings.
- Ball faucets (single handle that moves in all directions) use a rotating ball with springs and seats.
- Ceramic disc faucets (often single lever with a wide base) use ceramic discs that slide against each other.
Over time, rubber washers harden and crack, O-rings lose their seal, and valve seats corrode. Water pressure then finds a tiny gap to seep through, even when the handle is fully closed. That's your drip.
Step 1: Figure Out What Kind of Faucet You Have
Before you buy parts, identify your faucet type. Look underneath the sink or check the handle style:
- One handle that only moves up and down = likely cartridge.
- One handle that moves in a full circle (up/down and side/side) = likely ball-type.
- Two separate handles = likely compression.
- Single lever with a wide, flat base = possibly ceramic disc.
If you're not sure, snap a photo before you disassemble anything—many hardware stores can identify the type and match you with the right repair kit.
Step 2: Shut Off the Water and Relieve Pressure
This step gets skipped more often than it should, and it's the reason so many simple faucet repairs turn into a bathroom flood.
- Find the shutoff valves under the sink (usually two, one for hot and one for cold) and turn them clockwise until snug.
- Turn on the faucet to drain any remaining water and relieve pressure in the lines.
- Plug the drain with a rag or stopper—tiny screws and springs have a way of disappearing down drains.
Step 3: Disassemble and Inspect
For most single-handle faucets:
- Pop off the decorative cap on the handle (often with a flathead screwdriver).
- Remove the handle screw and lift the handle away.
- Depending on the faucet, you'll see a retaining nut, cartridge, or ball assembly. Use channel-lock pliers to loosen the retaining nut if needed.
- Pull out the cartridge or ball assembly and inspect the O-rings and springs for cracking, flattening, or mineral buildup.
For compression faucets with separate handles:
- Remove the handle to expose the stem.
- Unscrew the stem assembly and look at the rubber washer at the bottom—if it's cracked, grooved, or misshapen, that's your culprit.
- Also check the valve seat (the metal ring the washer presses against) for pitting or roughness, which can cause drips even with a new washer.
Step 4: Replace the Worn Part
This is the easy part, but accuracy matters:
- Take the old washer, O-ring, or cartridge with you to the hardware store so you get an exact match—faucet brands are not universal, and a slightly wrong size will drip again within days.
- Coat new rubber parts lightly with plumber's grease before installing; this helps them seat properly and extends their lifespan.
- If the valve seat is pitted or rough, consider replacing it or using a seat-grinding tool to resurface it—otherwise even a brand-new washer won't create a tight seal.
Reassemble in reverse order: valve seat (if replaced), washer or cartridge, retaining nut, handle, and decorative cap.
Step 5: Test Before You Declare Victory
Turn the water supply back on slowly and check for leaks under the sink first—tighten any fittings that seep. Then run the faucet through a full cycle: on, off, hot, cold, and check the spout and handle base for drips. Let it sit off for 10–15 minutes and come back to check again, since some drips take a few minutes to show themselves.
When to Call a Plumber Instead
Most drips are simple washer or cartridge issues, but call a professional if:
- The drip continues after replacing all suspect parts (could indicate a cracked valve body).
- You notice water damage under the sink or inside cabinets.
- The faucet is very old, discontinued, or parts are no longer available—sometimes full replacement is more practical than repair.
A Small Fix With a Real Payoff
A faucet dripping once per second wastes roughly 3,000 gallons a year—enough to notice on your water bill. Fixing it is one of the most satisfying beginner plumbing repairs because the cause-and-effect is immediate: swap the part, and the drip stops. With a $10 repair kit and 30–60 minutes, you can cross this one off your maintenance list for good.
Want help tracking faucet repairs, warranty info, and other maintenance tasks around your house? Start your free HomeNostics trial and keep your whole home's upkeep organized in one place.